Ask a Question
Search BRUIN Support for help articles.
Virtual Desktop for Bellevue University Students
Overview
Bellevue University’s Virtual Desktop provides secure access to a full Windows desktop from almost any device, including Windows and Mac computers, iPads, or through a web browser. Because it is cloud-based, the experience is the same no matter where you log in and does not rely on the capabilities of your personal device.
If your course requires the Virtual Desktop, access is automatically provided upon enrollment. Course-specific instructions will be included in your course materials. Students who are on campus may also use the Virtual Desktop on library, classroom, and computer lab computers.
This document provides step-by-step instructions for logging in, using the virtual desktop through either a web browser or the installed client, managing your session, and getting technical support if needed.
Web Browser Access
Use the web version for quick access or when installation is not possible. Advanced features, such as USB support and full file transfer, require the Horizon Client.
1. Navigate to the Omnissa Horizon launch page.
2. Select Omnissa Horizon Web Client.
3. Enter your username (Student ID number) and Bruin Connect password, then select Sign In or Login.
4. If you are off campus, complete the login using your Multi-Factor Authentication (MFA) method.
5. From the Horizon Launch window, select your assigned Virtual Desktop (for example: ISLAB Access, Toxic Lab Access, Cybersecurity Desktop, or CST Classroom Desktop).

6. Wait for the desktop to load. When prompted, choose full-screen mode if preferred.
Logging Off (Web Browser)
Always log off before closing your browser to save work and free up system resources.
1. Save your work and close all applications.
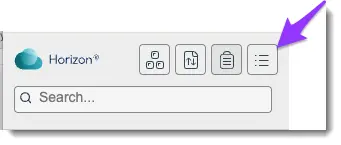
2. Select the sidebar menu.

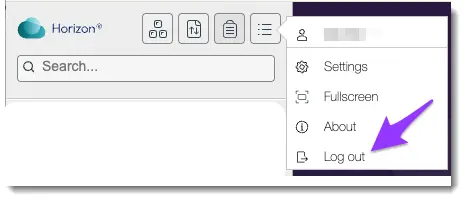
3. Select the Open Menu.
4. Select Log out.
Sidebar Services
The sidebar provides quick tools for managing your virtual desktop session:
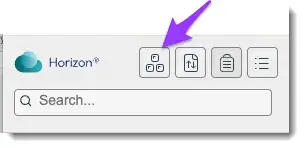
● Send Ctrl+Alt+Delete to Current Work Area – Use this shortcut if your virtual desktop is locked or to open Task Manager. Do not press Ctrl+Alt+Delete on your keyboard, as that will apply to your local computer instead.
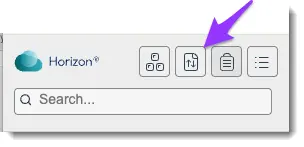
● Open File Transfer Panel – Upload or download files between your device and the virtual desktop. You may also use cloud storage services such as OneDrive.
● Copy/Paste – Copy text from your local device into the virtual desktop.
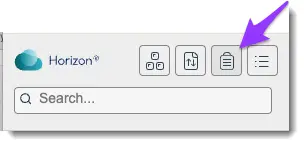
● Note: Copying is one-directional. You cannot copy text from the virtual desktop back to your local device.
● Open Menu – Access settings, help, display preferences, full-screen mode, and drive sharing.
Virtual Desktop Client
Use the installed client for full functionality, improved performance, and advanced features, including USB support and multi-monitor setups.
Installation Windows & Mac
Before installing the Horizon Client, review the system requirements for your device to ensure compatibility:
1. Go to the Download Omnissa Horizon Clients center.
2. Select Go to Downloads for your OS (Windows or macOS).
3. Select Download Now.
4. Run the installer (admin rights required) and restart if prompted.
Installation iOS (iPhone/iPad), Android, and Other Platforms
● iOS – Download from the App Store.
● Android – Download from the Google Play Store.
● Other Platforms – Available from the Omnissa Horizon Clients download center.
Omnissa Horizon Client Access
Use the following steps to configure the client when you first launch it. You will need to complete a one-time setup when launching the Omnissa Horizon Client for the first time.
1. Launch the Omnissa Horizon Client on your device.
2. Select Add Server. Under Name of the Connection Server, enter workspace.bellevue.edu, then select Connect. You only need to complete this step the first time you connect.
3. Enter your username (Student ID number) and Bruin Connect password, then select Sign In or Login.
4. If you are off campus, complete the login using your Multi-Factor Authentication (MFA) method.
5. From the Horizon Launch window, select your assigned Virtual Desktop.
6. Wait for the desktop to load.
Logging Off (Omnissa Horizon Client)
Always shut down your virtual desktop before exiting Horizon.
1. Inside the virtual desktop, click Start → Power → Shut Down.
2. Quit the Omnissa Horizon Client on your device.
FAQ
What happens if I close the client without logging off?
Your session may remain active for a limited time. Always log off to free resources and avoid losing work.
Are my changes saved?
No. This is a non‑persistent virtual desktop, which means files and changes are not saved locally. Any unsaved work will be lost when you log out or restart your session. To avoid losing your work, always save files to cloud storage (such as OneDrive), your personal computer, or an external drive (flash drive) before logging off.
Can I switch between Virtual Desktops?
We only support one virtual desktop session at a time. You cannot switch to a different virtual desktop while logged in. To access a different virtual desktop, you must first sign out of your current session and then log in again.
To provide feedback on this article, contact Bruin Support Services!